
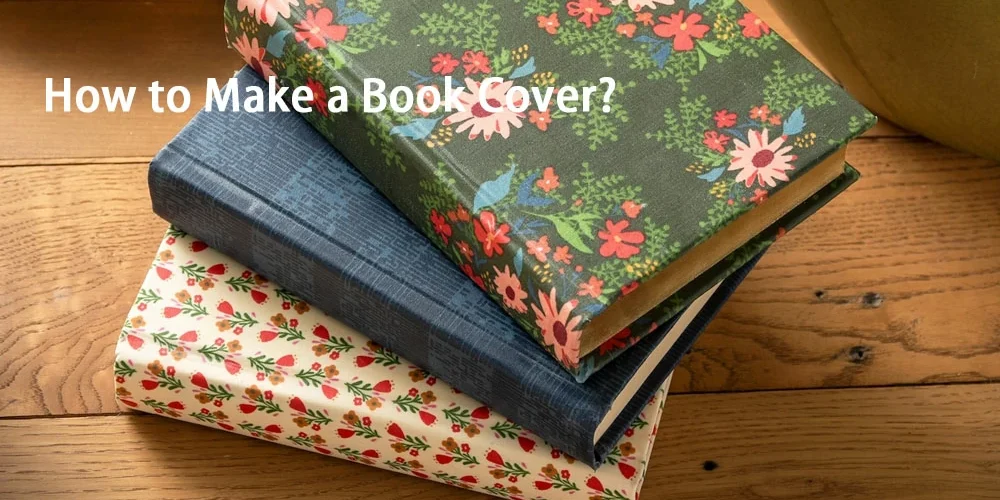
A thoughtful book cover can set a lasting first impression. The reader’s eye often starts with the outer design before the inner words. The cover can protect pages, convey themes, and strengthen a brand.
Individuals can create custom covers by hand using simple tools. Manufacturers in notebook factories use specialized machines and techniques to produce strong and consistent covers in large quantities. This article explains how to make a book cover by hand and how notebook factories use machinery.
Purpose of a Book Cover
A book cover must protect the pages inside. The cover must resist wear, moisture, and bending. A well-made cover can extend the book’s life by years. A cover also communicates the book’s mood. A bright design can signal fun or creativity. A muted design can suggest seriousness or history. A cover can even help a book sell better online. A high-quality image can improve click-through rates on search engines.
Part 1: How to Make a Book Cover (Handmade)
Before you start, you need to gather your materials and tools. Having everything ready will make your work flow more smoothly.Most are easy to find at any craft store:
- Book block (your pages)
- Two pieces of cardboard (for front and back covers)
- Optional spine board (for hardcover)
- Book cloth or decorative paper
- PVA glue + brush
- Utility knife + ruler + cutting mat
- Bone folder
- Scrap paper + waxed paper
- Heavy books or book press
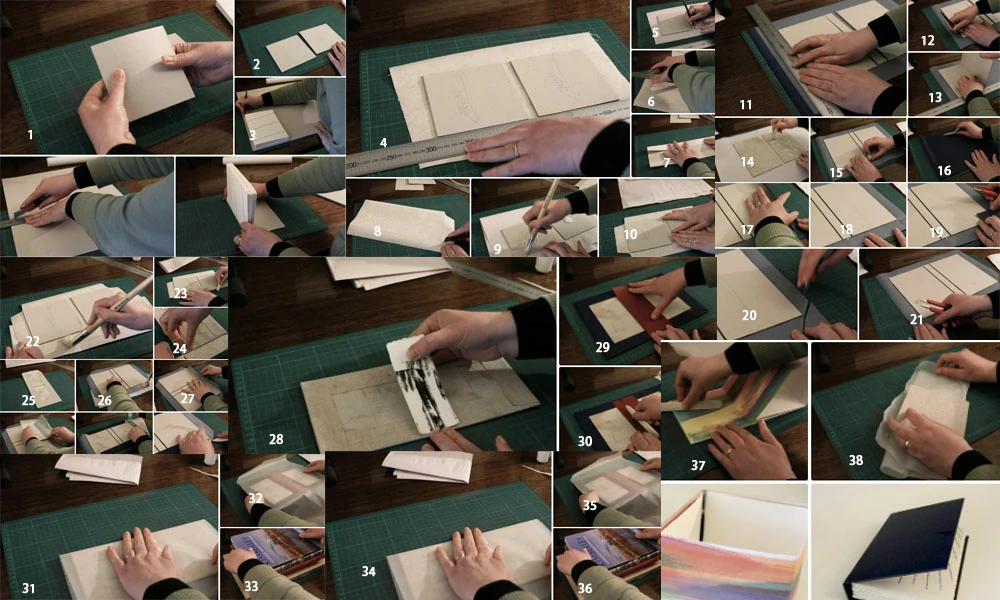
Step 1: Cut Boards & Check Grain
Gently flex each cardboard piece to find which way bends easiest—that’s the grain. Mark the grain direction so you’ll align it vertically later. Measure the boards to be about 3–5 mm taller and wider than your book block. Use a metal ruler and make several light knife cuts rather than one deep slice for a clean edge.
Step 2: Prepare Cover Material
Lay your book cloth or decorative paper face down, then position the two boards with a 6–8 mm gap between them. Leave a 2.5–3 cm border of material all around. Lightly trace the board outlines with pencil. Trim the excess material evenly, using a ruler and sharp blade for straight lines.
Step 3: Trim Corners & Glue Boards
At each corner, fold the material inward to form a small triangle; then cut at a 45° angle, leaving 2–3 mm of overlap at the edge. Apply PVA glue evenly to the back of each board. Carefully place the boards onto the material, keeping the grain running top-to-bottom. Press firmly to remove air bubbles.
Step 4: Wrap & Adhere Edges
Slip scrap paper under the long flaps, spread a thin, even layer of glue on the material’s underside, and fold over the board’s long edges. Use your bone folder to smooth each edge and get a crisp fold. Tuck in the tiny corner overlaps with the folder’s tip before folding the short sides. Wipe away any excess glue immediately.
Step 5: Reinforce the Spine
Cut a strip of lightweight paper or cloth slightly shorter than the book height, about 2 cm wider than the spine gap on each side. Brush glue onto the spine area inside the cover, then lay the reinforcement strip down, centering it over the gap. Run the bone folder along the length to secure and smooth the reinforcement.
Step 6: Press & Dry Overnight
Wrap your completed cover in waxed paper to protect it from sticking. Place it under a stack of heavy books or in a book press. Let it sit for at least eight hours—overnight is best—to ensure the glue sets flat and the cover stays completely smooth.
Step 7: Attach the Book Block
Once dry, align your book block inside the cover, making sure it sits squarely and centered. Glue coating the endpapers (or apply your chosen binding method) to the inside boards. Press under weight again for a couple of hours to bond firmly and eliminate any gaps or bubbles.
Part 2: How Notebook Factories Make Book Covers
Notebook factories handle large volumes of book production, often making thousands of book covers each day.Factories use advanced equipment to speed up the process, but the core steps are similar to the handmade method.
As a trusted Chinese supplier, GoGluing offers gluing machines specifically engineered for notebook, paper, and packaging applications, empowering businesses to accelerate production efficiency and elevate product quality.
The machines handle a variety of materials—from thin paper to thick board—and support both cold and hot-melt glues.
Let’s look at how book cover making works in a factory setting.

Step 1: Preparing the Boards and Cover Materials
Notebook factories use industrial board cutters and die-cutting machines to cut chipboard into precise sizes. Each cover typically includes two rigid boards and one spine piece.
At the same time, factories prepare the cover material. This may include book cloth, printed paper, laminated film, or even synthetic leather. The material must be cut slightly larger than the assembled board size to allow for wrapping.
Step 2: Apply Glue with a Gluing Machine
Gluing is a critical step in cover assembly.GoGluing manufactures specialized gluing machines designed for book and paper products.
Instead of brushing glue by hand, Factories use cold gluing machines or hot melt gluing machines to apply a consistent, even layer of glue on the back of the cover material. These machines:
- Apply glue evenly across a wide surface
- Control glue thickness precisely
- Reduce labor costs
- Prevent glue overflow
GoGluing’s gluing machines are especially popular in Asia and Europe for notebook production. They are fast, easy to maintain, and designed to work with cold and hot melt adhesives.
Step 3: Mounting the Boards
After applying glue to the cover material, an operator or automatic positioning system places the boards onto the glued surface. The spacing between the boards is controlled by guides or pre-set fixtures.
Advanced machines in modern factories can handle this step with robotic arms or semi-automatic placement, ensuring perfect alignment for every book.
Step 4: Folding and Wrapping the Edges
Once the boards are attached, the material edges are folded over the board. In many factories, this step is performed by case-making machines that automatically turn in the edges and press them down.
Using pressure rollers or folding blades, these machines replicate the smooth, tight corners typically made by hand but at a much faster speed.
Step 5: Pressing and Drying
To ensure a tight bond, the freshly wrapped covers are pressed in a conveyor press or stack press. The drying time varies based on the glue type and material used.
Water-based glue like cold may require drying tunnels or air-drying racks. Hot melt glue dries faster and allows immediate further processing.
Step 6: Attaching the Book Block
The finished covers move to the binding line, where they are attached to the book blocks. This may involve case-in machines, which apply glue to the endpapers and align the book block with the case.
Some factories use fully automated casing-in lines that can process hundreds of books per hour with precision.
Why Gluing Machines Matter in Book Cover Manufacturing
Book cover production is no longer limited to manual techniques. For notebook factories, speed and precision define success. That’s where GoGluing makes a difference.
Advantages of GoGluing Machines:
- Efficient: Machines are fast and reliable, minimizing downtime.
- Precise: Glue is applied evenly, improving product appearance.
- Flexible: Machines support different glue types and materials.
- Affordable: GoGluing offers competitive pricing and after-sales support.
With over 16 years of experience, GoGluing has become a trusted name for gluing equipment in China and abroad. Our gluing machines are used in notebook factories, photo album production, paper box assembly, and more.
Why Choose GoGluing as Your Gluing Machine Partner
If you are a notebook factory or a business owner looking for reliable gluing solutions, GoGluing is your ideal partner. GoGluing is here to support your next project. Whether you’re making notebooks, books, or packaging, our cold gluing machines and hot melt glue machines offer reliable performance at every stage of production.
Fill out our contact form and let’s talk about your needs — big or small, we’re ready to help. We respond 7 days a week.

Try Our Gluing Machine Today!
Glue Smarter. Work Faster. Free Demo
Conclusion
Making a book cover requires care, whether you’re using your hands or a machine. If you’re a hobbyist, start with basic tools and follow the steps closely. If you’re running a factory, investing in the right equipment — like those from GoGluing — will boost your productivity and product quality.
Whether handmade or machine-made, a good book cover protects the book and elevates its value.
Need help with your gluing setup? Let GoGluing assist your factory with modern gluing machines built for the future. Contact us today and request a free consultation!
FAQ
What basic materials do I need to make a handmade book cover?
You will need a book block, two pieces of chipboard, one spine board, book cloth or decorative paper, PVA glue, a glue brush, a bone folder, a ruler, a utility knife, scrap paper, waxed paper, and weights or a book press.
What is the best glue for handmade book covers?
You should use PVA (polyvinyl acetate) glue because it dries clear, remains flexible, and provides a strong bond between the cover material and boards.
What gap should I leave between the boards when wrapping?
You should maintain a gap of about 1/8 inch (3 mm) between the spine board and the cover boards. This space ensures that the cover can flex around the spine without tearing.
Is it legal to sell custom book covers?
Yes, you can legally sell custom book covers—as long as your work is original and doesn’t infringe on someone else’s intellectual property. If you’re running a notebook factory or handmade shop, it’s smart to stay creative and legally clear.


